Visit me at my other places too! * The Streaming Now * Out of my Ocean * My Name is Zing * Joy Frequencies * Twitter *


Showing posts with label Before and After. Show all posts

Tuesday

'Time' For Another Makeover!

Before and After - Clock Makeover!
To go with my newly revamped room (more photos coming soon) I decided I needed a small clock to put on my new floating shelves. It had to be cream or another pale neutral colour to blend with the other things displayed - here's a close up photo of some things in that corner, so you get an idea of the colour scheme.
Well, I had a look around a few shops but I couldn't decide on something I liked. Then I remembered the old clock that I needed to replace, it was originally a charity shop find and was only a cheap battery clock that now looked very tatty - plus it had that dark wood look that I was longing to be rid of

Aha, I thought - perhaps I could give it a makeover!

Within 10 minutes I had taken it to bits and it was laying on my desk.

I gathered old newspaper and my box of paints and set to work. I had in mind a sort of shabby chic paint effect - so first, I gave it a coat of caramel coloured paint, which I then left to dry.

I then began dry brushing on various shades of cream, being careful to leave the caramel colour showing in the mouldings etc. I also painted the black outer ring of the clock face with gold paint.

When it was dry, I went over some parts and gently highlighted them with just a hint of gold. I also dry brushed over the clock face outer rim with cream paint - leaving just a little of the gold showing through.

Then it was time to reassemble the clock and finally see the finished makeover!

Well I was very pleased, it was great!

It looks just right on my new shelves - and best of all I didn't have to pay for a new clock!

Here is a BEFORE and AFTER picture so you can see the results!

Move Things Around!

Just by moving things around it can make a room feel like a whole new space. Paintings that blended in to a light coloured wall suddenly stand out and look vibrant against a dark one. Things take on a new life when they are put into a different place.

GO ON MOVE SOMETHING!

After a while we tend to stop seeing things when we get used to them, they just seem to fade into the background but if you move them somewhere new, because your eye isn't used to seeing them there - you notice them again!

The large painting on the wall were painted by me. :-)

Friday

Makeover - Sofa's and a New Rug

For a while now we have been feeling that our living room needed updating!
BEFORE - The old sofa and rug
Lots of the things we had furnished and decorated with when we moved here six years ago, was stuff that we bought with us from our previous home, an old cottage with small windows, thick walls and dark beams.

At that time I loved wooden things and dark subtle colours, the sort of things that were in keeping with the cottage we lived in.

The last couple of years I had felt claustrophobic surrounded with all that stuff, especially as our new place has huge windows and is filled with so much light. So gradually the wooden things I had collected were consigned to boxes and brightly coloured things took their place, but there were still things about the room that had that same look.

The old brown chesterfield sofa's were covered in cat scratches and puncture holes and the whole room had a tired feeling.

So we bought a couple of sofa's from ebay and set about giving the room a bit of a makeover!
AFTER - The new sofa and rug

The sofa's were a lovely blue colour that instantly made a difference and livened up the room after the dull brown ones we were used to.

Though I am afraid the arms already have puncture holes from one of our cats jumping or should I say climbing up! I have put a throw over the arm to hopefully stop it becoming a pin cushion too quickly!

Once the sofa's were in place, I then decided we needed a new rug for the floor, to replace the nice (but brown!) one we already had.

Well I have never been afraid of colour and I think I proved it with my choice of rug! It looks great and already the room looks so much more colourful and vibrant - it looks as though it has had the kiss of life! :-)
THE NEW COLOURFUL RUG
The only trouble is, all these new things have really shown up that the floor needs re staining and varnishing! Never mind, that will be a job for another time!

Of course, by changing one things it leads to a whole series of changes! so this was just the first in a whole chain of events. I have taken lots of photos of the other changes that we have made - but I will save them for another post!

The room feels so much better now - and it has started me thinking of moving on to redecorate the hallway!

Shhh, don't tell my lovely man, he has only just recovered from these changes. - Lets just say, he doesn't enjoy the makeovers quite as much as I do! ;-)

Part of the Garden - Before & After

Our home was previously inhabited by an old couple who had lived there for many years, when we moved in the garden was very overgrown though contained lots of beautiful mature plants and fruit bushes too - though we had to clear a lot of stuff to find them! I wrote about it in the post A Reminder Of Summer.

There was one part of the garden, to the back of the house that had been used for storing the rubbish bins and had become a general dumping ground.

It gave the impression of being an unloved, dark, damp area, being North facing and its only saving grace were two mature plants, a lilac bush and another that is smothered in white scented flowers at this time of the year (maybe a mock orange? I am not sure) and although most of the garden is surrounded by a nice thick hedge, this side was open to a neighbours garden and the small woodland behind.

At first we concentrated on transforming the main area of the garden bit by bit and used the ramshackle old sheds and the area at back for storage. Though as we could see the shrubs from the kitchen window I did hang small glittery mirror balls from one of them. :-)

We eventually put up a fence to mark the boundary and give us some privacy, we painted it green to blend in with the backdrop of trees and then set about transforming it from an unloved area into a garden.

When the rubbish had been removed and the fence had been erected. This is what we started with.

After lots of thinking, planning, digging, laying paving and bricks, finally the transformation was complete! and when things had started to grow - this is what the damp, dark, unloved area became!


The old sheds were eventually taken down and replaced with one big spacious building.

Paving was laid, curvy beds marked out and edged with old salvaged red bricks.

Covers were made for the ugly drains and plants were placed on top of them.

Plants were moved from other parts of the garden and settled into homes in the new beds.

We added a table and chairs and a pretty bird table for our feathered friends. You wouldn't recognise it as the same space!

A real transformation I think you will agree. :-)

Since these photos, it has matured even more. I wrote about it in the View From My Kitchen Window -

"Clematis smothered with huge cream flowers, cornflowers at its feet piercing the grey morning with colour. Burgeoning nature bursting from the confines of the brick edged beds, a riot of green energy vital, vibrant, alive. I observe from my kitchen window, mesmerized by it seemingly growing before my eyes - behind me the kettle boils."

Quite a different view these days from the kitchen window. :-)

Other garden views - Here

Saturday

The Making of a Vegetable Patch

A couple of years ago we were reading about small space gardening, and decided that we had room in the area just in front of the fruit bushes for a small scale, raised bed growing area.

So, as we like to reuse and repurpose things, we started to keep our eyes open for materials. It wasn't long before our eagle eyes spotted just the opportunity we were looking for.

A house in the village where we live, had been sold and the new owners were doing extensive work to the house (an old converted chapel).

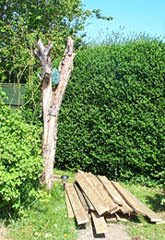
We drove by one day and saw the huge skip outside, almost full with decking boards that had been removed from the garden. They were still in great condition so rather than them end up in a landfill, we asked if we could have them.

Great, we now had the materials, we also had some paving slabs (also reused) that we collected from someone on our local Freecycle group that could be used as a path around the edge and to lead to our newly aquired compost bin (also from freecycle).

So one sunny day after laying out the paving stones roughly where we wanted the path, Joe got to work digging the vegetable patch.

The raised beds and a middle walkway were skillfully constructed and the beds were dug and filled with more soil.
Planted, and with compost bin in place, we are all set.
Now just to watch it grow!
A successful project! the curly Kale was delicious, the lettuce was good too.

Just shows what can be done with things that other people are going to throw away, some good design skills and hard work! (thanks Joe).

Sunday

Bathroom - Before and After

Well, our bathroom is tiny! it has one smallish window that faces north so doesn't get any direct sunlight and though a small room it has always been a pleasant space. Then back in the summer the landlord wanted to update the fittings and install a shower (lucky us!) so our old familiar bathroom was stripped out and new fittings installed.
BEFORE


We were really fortunate in being able to choose our own paint colours and flooring, and I made a very daring choice for such a small space. I had totally fallen in love with the colour I chose as soon as I had scanned the paint chart. This mouth wateringly deep saturated yellowy green jumped out at me, and I was hooked!

With the choice of very light flooring and the wall of white tiles over the bath and shower area I felt (hoped) that the room could take it.

AFTER


After lots of worrying about whether or not I had made the right choice, the transformation happened and I am glad to say I love it.

Thank goodness for that!

Friday

Well, we needed more storage...

We decided that we definitely needed more storage. Even after we had spring cleaned and shipped out what seemed like lorry loads of things to the local charity shops or offered it on our local freecycle site. there were still piles of stuff without a home, and under the bed was full :-) .

So when an old pine cupboard appeared in our freecycle emails we thought it would come in very useful. We picked it up and bought it home and though a little rickety it had plenty of space inside.


Cupboard 'Before'.


After staring at it for a while, inspiration struck and I had an idea for its transformation. So with the help of my lovely man Joe, handles were removed and it was made less rickety. It was then rubbed down slightly to take off the varnish ready for painting and some timber was cut to make little legs 4 inches high. Joe then cut and shaped some wood we had in another of our stockpiles! to make a top with an overhang of two inches on the front and both sides. Then over to me, ready for painting!

First I gave the whole thing a coat of a soft beige colour, when that was dry, I painted into all the grooves and around the edges with a soft pale green. I then dry brushed both a warm cream and ivory colour to highlight areas. When I was happy with the results and while I was waiting for it to dry, I rummaged through my stash of handles (OK, OK, so I am a hoarder ;-) ) and found some nice curved chrome ones that I thought would look nice. As Joe was screwing them on he twisted the tops of them out and I thought, wow, that looks perfect! and that's how they stayed!

So in an afternoon, our new storage cupboard was transformed into this....

Cupboard 'After'.


It now sits proudly in the corner of our room, new storage achieved!
Related Posts with Thumbnails